What is a Nested Dynamic Form
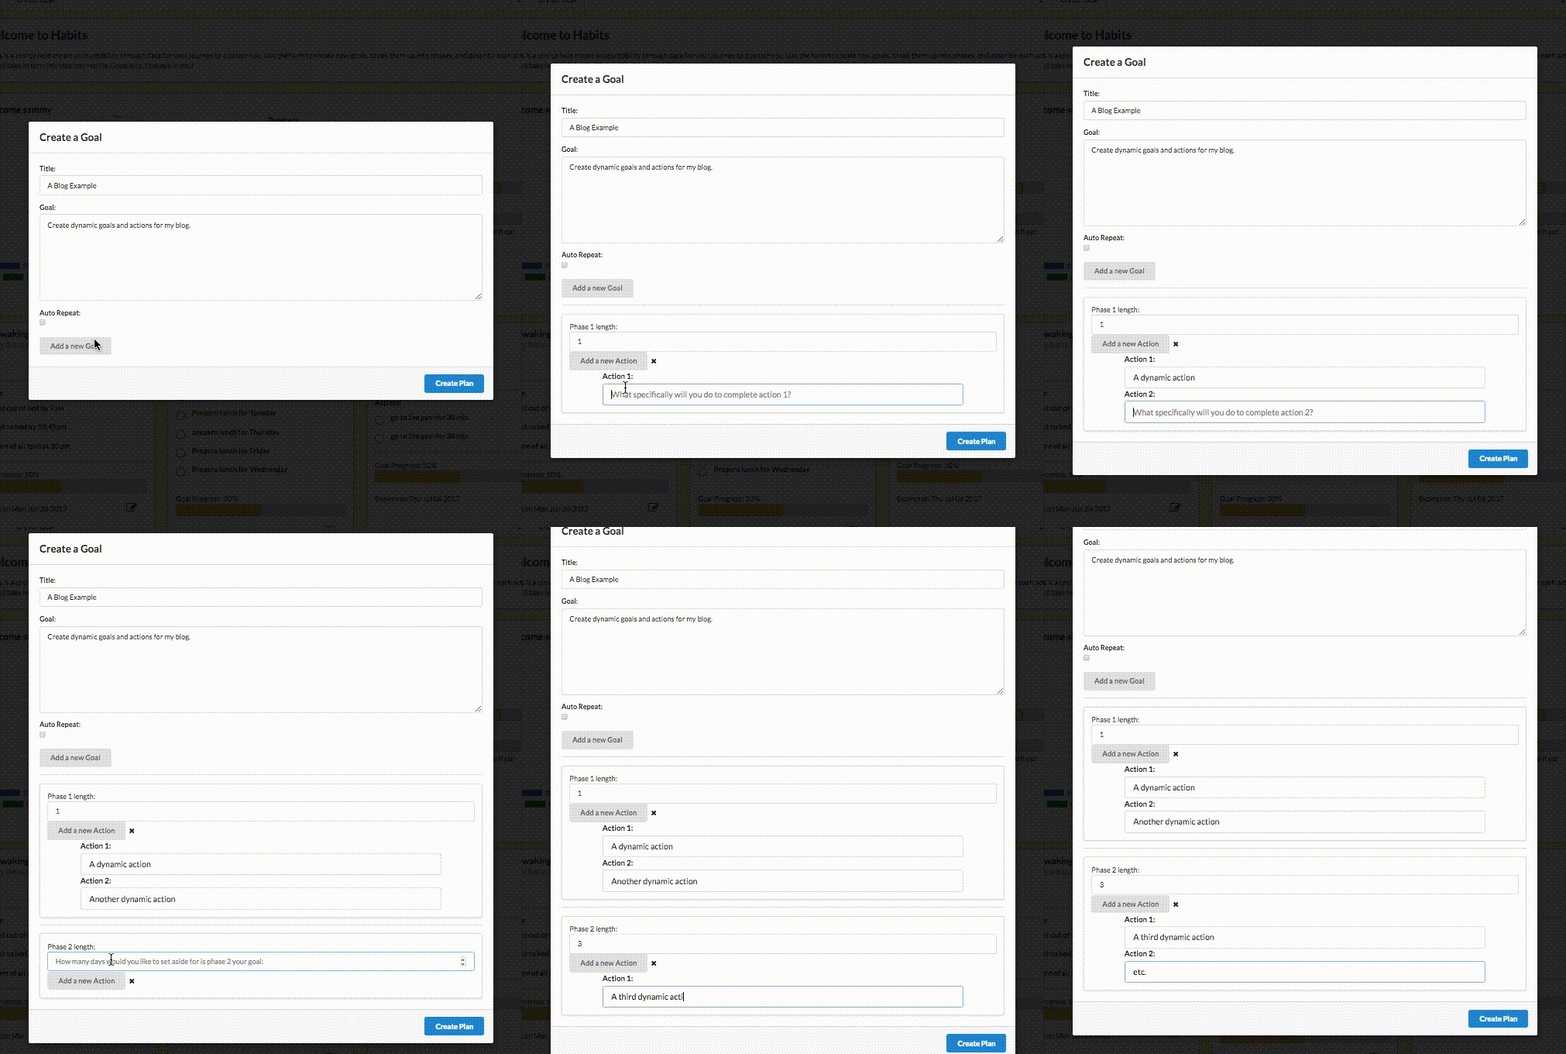
Sometimes a form needs to expect the unexpected. When that happens, when the user needs freedom and flexibility, old-school forms just wont cut it. For Habits, I wanted to give the user the ability to add as many fields to the form as they needed to express their goal.
Habits is an activity tracking app that is part accountability through gamificaiton, part exploration of the quantified self, and part guided self betterment. When using the Goal creation form, users are encouraged to give their goal a name, as well as a brief description or motivational sentence. Then, users are asked to divide their goal into smaller, more manageable chunks, divided into phases of time, and each phase is comprised of various actions. When the goal is created, the user’s inputs are translated into a card that allows them to check off what they’ve accomplished toward their goal, divides up the work according to their schedule, and gives them insights into their progress.
In order to cover all that, our form needs to be very special. This is what it’s going to look like:

But we won’t get to that in this post. In this post, we will go through the basics of React forms to get us up to speed for what’s coming in our next post.
Standard Javascript Forms
Let’s build a simple from to accept a ‘name’ input from the user and send if off to our database, in vanilla Javascript. Here’s what our form would look like.
1 2 3 4 | |
Next we need to create an event handler on window.load to listen for the submit event and hanle sending our information to the api.
1 2 3 4 5 6 7 8 | |
That’s one way to do things in vanilla Javascript. It’s messy, slow, and not very efficient. Things can get even crazier when there are lots of elements on your page. Searching through all those DOM nodes can get expensive. And when we want to do something dynamic in our form, like in the example above, this process can get very complicated very quickly. React gives us a better way.
Controlled inputs
In React, we try and stay away from the DOM, and use the virtual DOM instead. This means that when we go and look at what the user entered in our form, instead of checking for the form input values in the DOM, we store it in temporary memory, in the React component’s state, and just grab it from there when we’re ready.
Our React state for a name input looks like this:
1 2 3 4 5 6 7 8 9 10 | |
All this does is create a GoalForm class component in React with a state object that has a value of ‘name’, which points to an empty string.
Instead of having the React component store the information of the user’s input and have the user’s input be stored in the DOM, which would break the single source of truth convention, we just have the component’s value display the state. That is called a controlled input.
Our form looks like this:
1 2 3 4 | |
This form has one text input field for a name, that shows the value of the name object in the component’s state. When a user enters something in the input field, that input is intercepted by our handleChange function, which updates the state, the Component is re-rendered, and the new state is shown as the value.
Handling Changes and form Submission
Our handleSubmit and handleChange functions look like this:
1 2 3 4 5 6 7 8 9 10 11 12 | |
Conclusion
This is a lot to wrap your head around, controlled inputs, preventing a lot of default actions, completely sidestepping the DOM! I know, it’s a lot. But it’s about to get crazier. In part two, we’ll discuss how to give the user the ability to dynamically add inputs in this controlled system. Stay tuned for Part II.